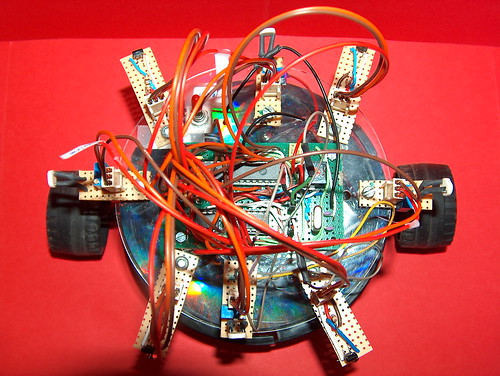
Figure 3: A view of Caroll from below

Building the robot
Mechanical parts
Figure
3 shows how Meccano parts are used to fix the motors to the DVD Box.
-
Batteries are fixed at the bottom of the box.
- The motherboard and the sensors are screwed on the plastic protection disk one found on top of the DVD stack, inside the box.
- Sensors are connected with 3-wires standard connectors to the micro-controller.
- Motors are connected to the output of two TC4427A Mosfet drivers with a 2-wires connector.
Light sensors
Light sensors, built from photo-resistors, have an analog output which will be converted inside the micro-controller by the built-in AD converters.
A light sensor corresponds to the schematics shown on figure
4. The wiring schematics, using a 22KOhm adjustable resistor is described in figure
5. Figures
6,
7 and
8 are pictures of the final unit, which can give ideas on how to solder all the stuff together. Figure
9 shows a sensor in position.
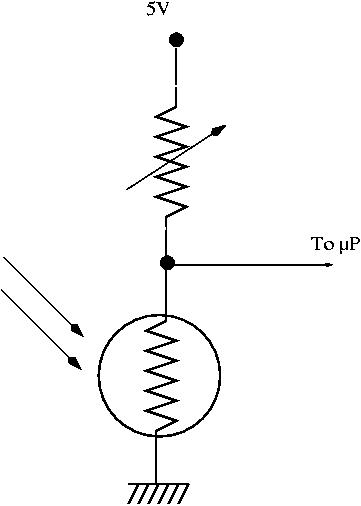
Figure 4: Light sensor schematics
|
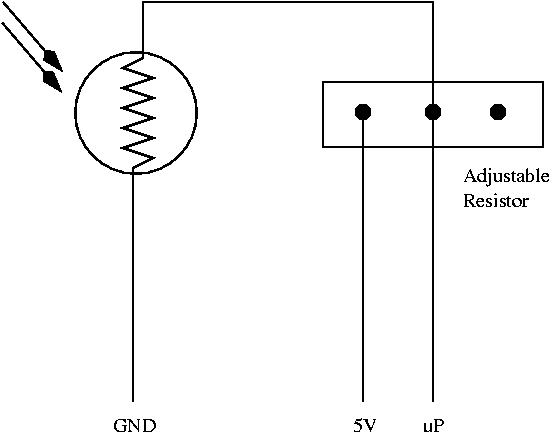
Figure 5: Light sensor wiring
|
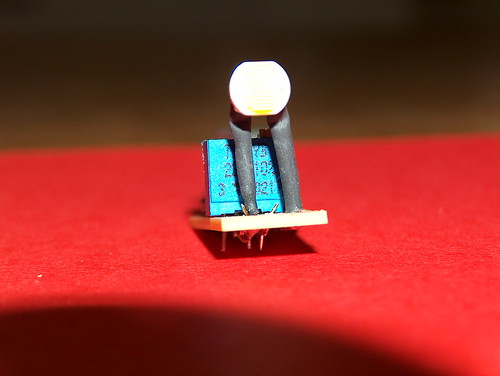
Figure 6: Light sensor (front view)
|
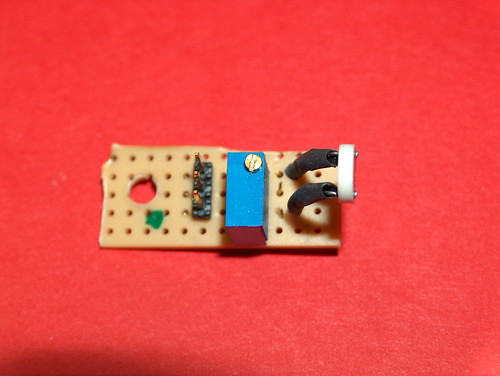
Figure 7: Light sensor (view from above)
|
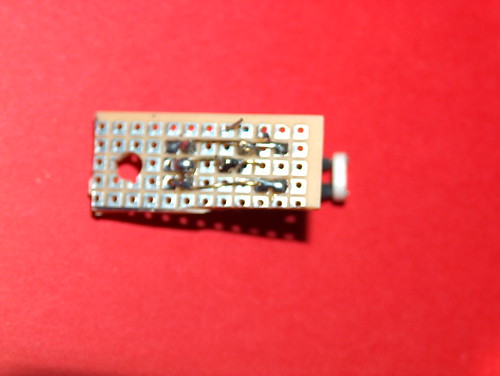
Figure 8: Light sensor (view from below)
|
| |

Figure 9: Light sensor in position
|
|
Proximity sensors
Those sensors are build from an IS471F and an infra-red LED. They can detect obstacles at a distance of circa 10cm, depending on the obstacle color. The output is digital (0 if obstacle in front, 1 otherwise).
Figures
10 and
11 show the final module. Connections are, as for the light sensors : GND, +5V, micro-controller, from top to bottom. Figure
12 shows the sensor in position.

Figure 10: Proximity sensor from above
|

Figure 11: Proximity sensor from below
|
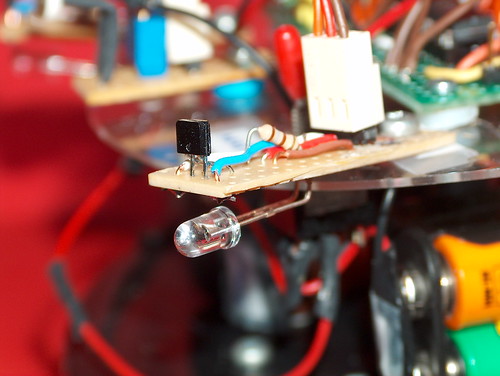
Figure 12: Proximity sensor in position
|
The motherboard
The final implementation of parts on the board strongly depends on personal skills...
Figure
13 shows the step preceeding the final soldering: the experimental board.
The coding wheel is used to choose how the robot will behave when powered on: either reflex moving (seeking the maximum light) or learning. Details on the choices are given into
the program file.
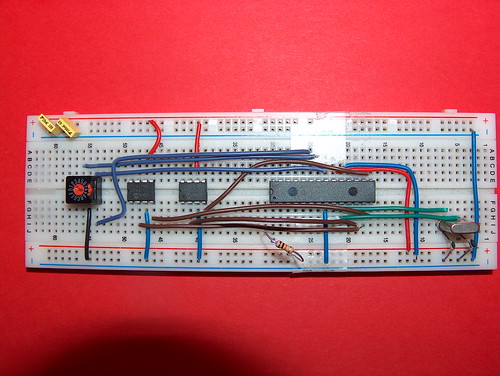
Figure 13: Motherboard wiring
Figure
14 shows the connections from the PIC to the ICD2 programmer.

Figure 14: Motherboard with its connection to the ICD2 programmer
Programmation
The program gives the robot two basic behaviours and some variations:
-
Reflex behaviour: move towards the maximum light intensity.
- Learn to move.
Both behaviours are coded inside the same program. Choosing the value on the coding wheel before switching on the robot lets us define the robot's behaviour.
Reflex moving
This behaviour is chosen when the coding wheel is set to 4 (100 in binary). The program then just reads the four light sensors, orders the sensors according to those values, and chooses the direction where the intensity of light is maximum (i.e. the digital value read from this sensor is minimal).
Little work is to be done in order to also integrate the proximity sensors...
Learning
The algorithm used here is a simple Q-learning algorithm :
-
Each time the total intensity of light perceived by the robot increases, it receives a reward.
- This reward is increased if the chosen move is not turning.
- The program memorizes and estimates the expected reward in each possible situations.
- Based on those estimations, it chooses the action for which the expected reward is maximal.
For details on reinforcement learning, see
Sutton and Barto's book, and more particularly
the description of the algorithm.
The program source is
here.
This is the
linker script.
You can also download the
hex file.
In case you can use the hex file with another programmer than the MPLAB ICD2, please let me know...
Some comments on the program
A state, based on the value of the robot's sensors could have been defined by :
-
The order of the light sensors (based of the intensity of light each sensor receives).
- The presence of an obstacle in front or behind the robot.
There are 24 possible orders for the 4 light sensors, and at first glance 16 possible configurations of the (digital binary) proximity sensors. This would lead to a total of 24 × 16 = 384 different states. As there are four possible actions, this leads to a total of 1536 (state,action) couples.
As reinforcement learning, in its basic acceptance, needs to store all the possible
Q(
s,
a) values, it would then be neither impossible to store those values in EEPROM (1024 bytes), nor in the data memory (3968 bytes < 1536 × sizeof(float)=4).
If the robot can not store the
Q(
s,
a) values into its EEPROM, it would be impossible to flush back its EEPROM in order to see what has been learned, and incremental learning (that is to say, beginning to learn from previously learned values) would also be impossible, as the only non-volatile memory is the EEPROM.
For this reasons, we restricted the state description to the following :
-
The order of the light sensors.
- Two booleans telling whether there is an obstacle in front or behind the robot.
This restricts the number of states to 24 × 4= 96, the number of (state,action) couples to 96× 4=384, and the space occupied by 384 floats to 384 × 4 = 1536.
It is now reasonnable compared to the size of the data memory, but still a little bit too much if you want to store values into the EEPROM.
We then decided to store an integer approximation of
Q(
s,
a): as those values will always be between 0 and 10 (due to the elementary reward and the value of gamma), before storing a value, we multiply it by 6553.5, and take its integer part, which is stored into the EEPROM.
The inverse process is applied when one needs to extract a stored value from the EEPROM.
Then we use only 768 EEPROM bytes, with little loss of precision, and have still room to store other information (value of alpha, epsilon...).
Conclusions
Some tuning is still necessary to enhance the learning process: values of alpha, rank, gamma...
There is still plenty of room into the program memory (the actual program occupies only 10% of it!) to think of other learning schemes, neural networks for example.
Feel free to ask for more informations, bugs ...: Francesco.De-Comite@univ-lille1.fr
Should you find this article useful for you, may I ask you to send me a postcard from were you live ? My address is on my main page.
This document was translated from LATEX by
HEVEA.